Try some Iceland-themed activities

If you enjoyed the Iceland Country Quest, but you still want to learn more, how about some of these Iceland themed activities?
They’re a fun way to learn a little bit more about Iceland. There are some craft activities, science experiments and a cooking challenge.
Remember to send photos to Questa and Zeke if you try one!
You can send photos to us on Instagram, Facebook or via email.
Experiment with an Exploding Volcano
Making a volcano is a great science experiment to try. It can get pretty messy, but it’s a good example of how volcanic eruptions can be unexpected and quite violent!
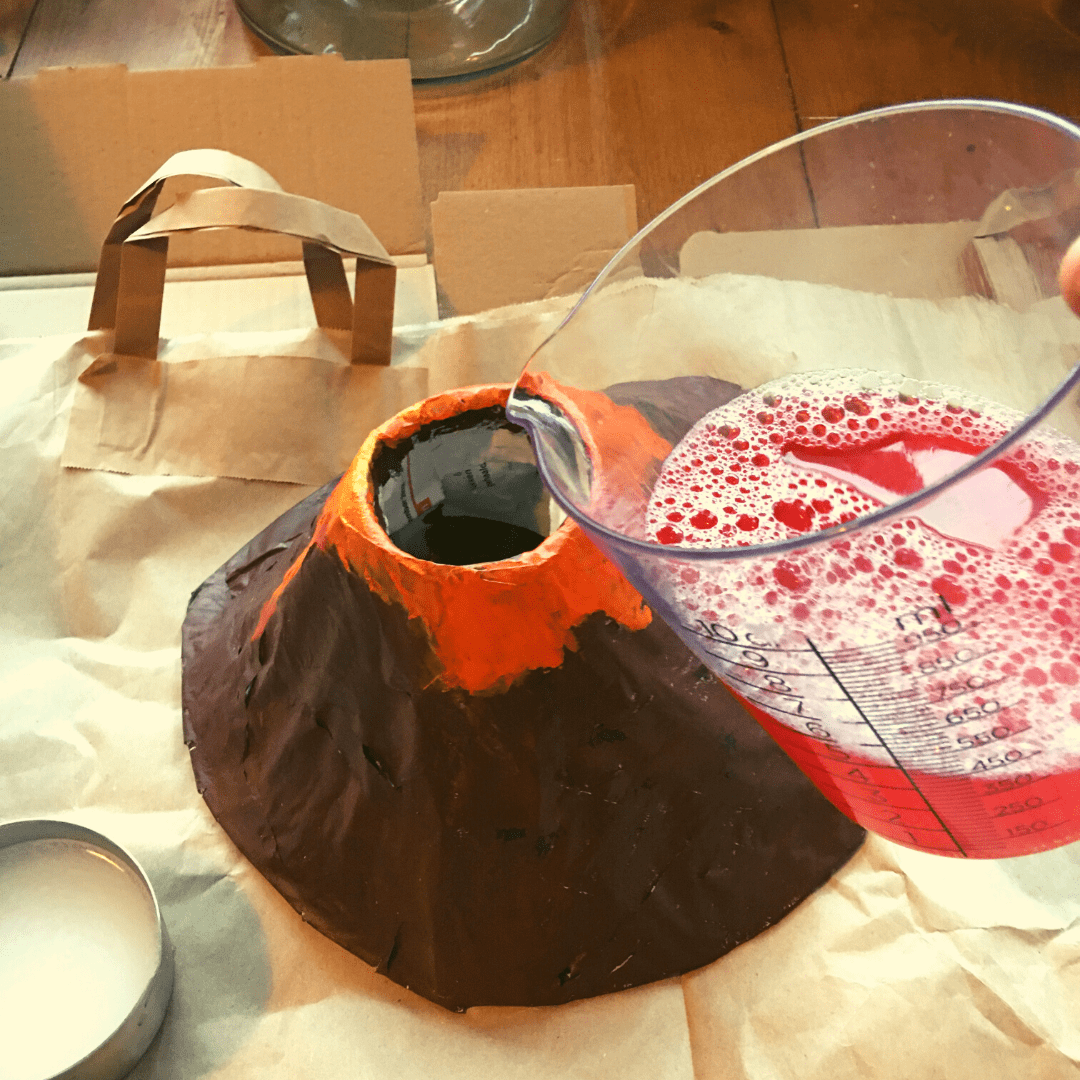
First, create your volcano (you don’t have to do this bit, but it makes it much more believable). We created ours out of an empty jam jar, a cardboard and sellotape frame and basic papier mache, painted like a volcano.
You’ll need:
Once the volcano is ready to work, you’ll need the following ingredients:
10ml washing up liquid
100ml warm water
400ml white vinegar
Food colouring (we used yellow and red to make an orange colour - you’ll need more colouring than you think)
½ cup of baking soda
½ cup of water
Instructions:
Mix together the washing up liquid, warm water, white vinegar and food colouring in a jar or jug.
Mix the ½ cups of baking soda and water and mix together to make a paste. This works best with warm water.
Prepare your volcano space. Be aware that this experiment is messy. You can do it outside or in a bathroom, or inside a plastic box. We used several layers of cardboard to protect the floor, but had some close calls with spillages.
Once all those things are ready, you’re ready for the experiment.
PARENTS BE AWARE: Every child I have ever done this with, has attempted to stick their fingers in the ‘lava’ during the experiment. This will make an already messy process even messier. Be prepared to bark “fingers out!”.
The experiment:
Pour the liquid materials into the volcano first - don’t fill it up too high or the explosion will be massive. We settled with half full, but could probably have used less.
Slowly pour in the baking soda paste and watch the eruption!
The Science Behind It
This experiment is fun, but it’s also a great example of a simple chemical reaction. The acid in the vinegar reacts with the sodium hydrogen carbonate in the baking soda. It creates a massive amount of carbon dioxide which bubbles up into an eruption! The washing up liquid becomes foamy and makes the bubbles spill out like lava. The food colouring makes it the right colour!
Recreate the Northern Lights with a craft jamjar
Lots of people dream of visiting the Northern Lights. This craft isn’t quite as good, but it’s still a fun craft for a wintery night or rainy day activity for kids.

The Northern Lights or Aurora Borealis is a beautiful natural phenomenon. Only some are lucky enough to see them live. But you can get pretty close with this craft activity making a Northern Lights jamjar. It’s a great activity for kids because they can get creative - particularly with colours.
We recommend that you start this craft activity with a quick discussion of the Aurora and how it happens. Get kids to look for pictures of the Northern Lights (we’ve made a Pinterest board called Colours of the Northern Lights) so they can see which colours are appropriate. Kids can let their imaginations run free with the colour scheme, but the most common colours for the Aurora are greens and purples, although reds and yellows crop up too.
There are also lots of beautiful legends explaining the Aurora. Our favourite is this animated story, explaining the Finnish legend of the Fire Fox.
You’ll need:
A glass jar
Tissue paper in different colours (make sure you have black)
PVA glue or ModPodge
A paintbrush
A tealight (candle)
Instructions:
Start by deciding your colour palette. Rip up tissue paper in the colours you’ve chosen. Start by tearing the paper into strips, but not too large.
Use the paintbrush to paint the tissue paper pieces onto the jam jar in graduating layers. Don’t make the layers too thick, or you’ll block out the light from the candle, but not too thin as the colours won’t be clear enough.
We recommend using a dark colour like black around the bottom quarter of the jar. With enough layers, this gives the impression that there’s land at the bottom of the jam jar, making it more effective.
And voila! The final result:


Make a snow globe
There’s something about snow globes! The best part about this make-your-own craft is that you can use whatever you want inside the snow globe. We tried to find a miniature Polar Bear for a truly Arctic version, but stuck with a fir tree instead.
Snow globes are a charming type of Christmas decoration and you can make your own version! We made our version with a Christmas tree ornament because that’s what was lying about, but we’re looking forward to making a new version with some plastic animals.
This craft can take a little time, particularly for allowing the glue to dry, but it’s still a lot of fun. Also, it’s probably best to avoid giving your kids superglue - you can also use a water resistant kid-safe glue like Gorilla Glue.
Some people also recommend gluing the lid of the jamjar closed once you’re finished, as curious kids may be unable to resist the urge to open the jar and see what happens (answer: wet, glittery floors).
You’ll need:
A jamjar with a lid
A Christmas (or other!) figurine
Superglue
Distilled water*
Glitter
Glycerin
*It’s important to use either distilled water or boiled water for this craft, particularly if you want it to last. If there’s bacteria in the jar it ruins the craft.
instructions:
Glue your ornament to the inside of the jamjar lid and leave to dry.
Add the distilled/boiled water to the jamjar, followed by glitter. The glitter may lump up at the top, so use a stick or spoon to mix it in. Add a few drops of glycerin. The glycerin thickens the water and gives that ‘snow falling’ effect, rather than just sinking straight to the bottom. You can work out if you’ve gotten the proportions right by gently mixing the liquid and seeing if the glitter falls like snow.
Once the ornament is dried on the lid, screw it on tightly (and perhaps glue it down), then flip it over.
Here’s our final version!

Try a recipe for Icelandic Skúffukaka (Chocolate cake)
There’s not much to say about this, other than it’s delicious! We’ve tried to make the instructions as kid-friendly as possible, pointing out a few mistakes we’ve suffered in our own struggles (the melting icing incident was pretty epic)
Skúffukaka is sometimes described as a brownie and sometimes as a chocolate tray cake. Either way, it’s delicious - and easy to make!
The best part about Skúffukaka is that most Icelandic families have their own recipe. We’ve put a basic recipe below, but you can add all sorts of different twists to it if you like. For us, the thing that makes Skúffukaka truly Icelandic is the use of Skyr.
Icelanders will tell you that although Skyr looks like yoghurt, it’s actually a type of cheese. It originally came from Norway, but eventually was only eaten in Iceland, where it’s a staple food. Luckily Iceland has been exporting Skyr for a while now, so you can often find it in supermarkets. If you can’t find Skyr, Greek yoghurt will work as well.
Ingredients (Cake):
280g caster sugar
125g butter
1 tsp vanilla extract
3 ggs
200g white flour
1 ¼ tsp baking soda
1 tsp salt
50g cocoa
1 tsp cinnamon
100ml milk
Ingredients (icing):
130g butter
1 egg
250g icing sugar
1 tbsp cocoa
1 tsp vanilla extract
100g dark chocolate, melted
2 tbsp double cream
Coconut flakes (to look like snow!)
Instructions:
Preheat the oven to 180°C.
Grease a 9x9’’ baking tray
Sift together the flour, baking soda, salt, cinamon and cocoa.
Use a mixer to cream the butter and sugar together to 1-2 minutes. Add the eggs one at a time, mixing well each time. Add the vanilla extract.
Mix on a high speed for 6 minutes until the mixture is light and fluffy.
Add the dry ingredients to the mixer and mix until it is combined, but not for too long!
Add the milk and mix again.
Scrape the batter into the greased baking tray and spread evenly.
Bake for 30-40 minutes. Stick a toothpick or sharp knife into the cake and if it comes out clean, without anything sticking to it, then the cake is ready.
Put it on a wire rack to cool completely.
For the icing:
Mix the butter with a mixer until it is soft and moving well.
With the mixer at a low speed, add the icing sugar, spoonful by spoonful. Make sure to mix all the sugar in before adding more.
Add in the cocoa and vanilla extract and mix.
Add in the melted chocolate (which should be fairly cool, not hot!) and mix.
Add in the double cream, then taste to see if you like it. Keep mixing until the icing is smooth.
TIP! If the icing isn’t quite stiff enough, you can put it in the fridge for a bit.
Spread the icing over the cake. Make sure the cake is cool before you do this! If you don't, the icing will melt and slip off the sides.
Sprinkle over coconut flakes to look like fallen snow.